

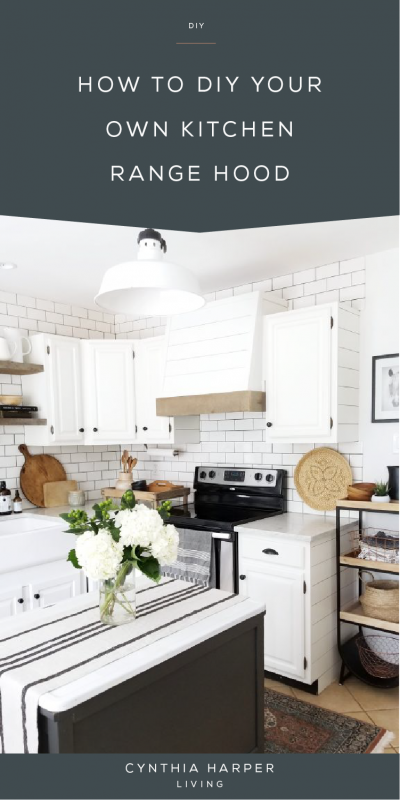
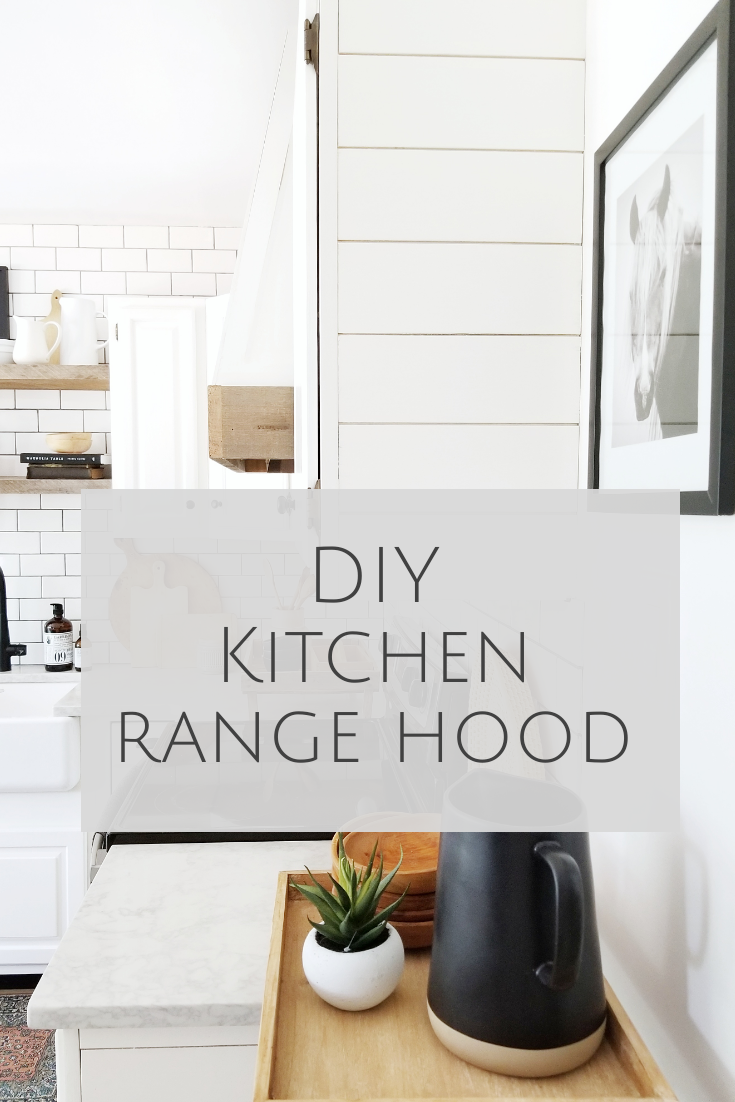
How to DIY Your Own Kitchen Range Hood
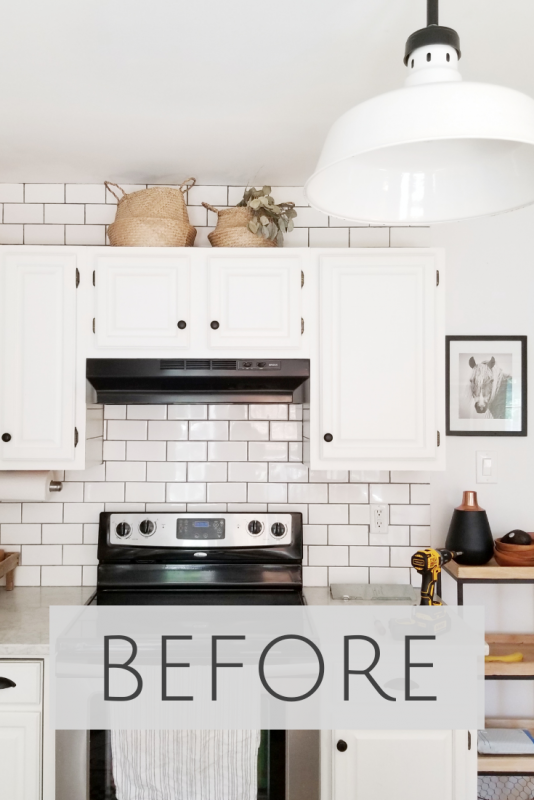
When my husband asked me what I wanted for my birthday, I immediately replied that I wanted to do a house project. I’m not sure that he was too thrilled about this, but it was my birthday and he agreed that would be fine. And the project I chose was a custom range hood for our kitchen! We renovated our kitchen in 2016, but in order to stay on-budget, we kept our existing plain Jane range hood that was already in the kitchen. It was black so at least it worked with our new kitchen, and it has continued to function fine these past few years. In all honesty, it was perfectly fine and we could have left it alone. But I had been dreaming and scheming of a new custom hood range for quite a while because I knew that aesthetically it would really make the kitchen look better! Here is the BEFORE:
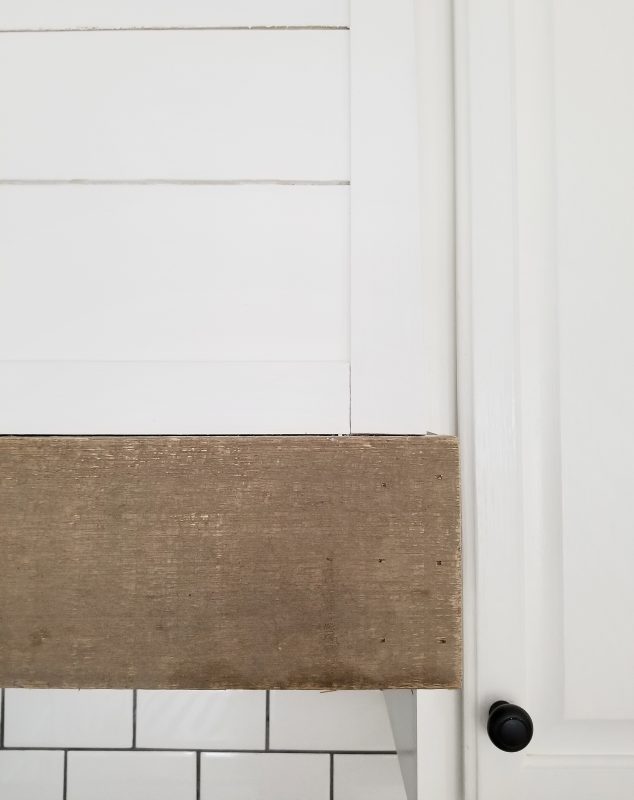
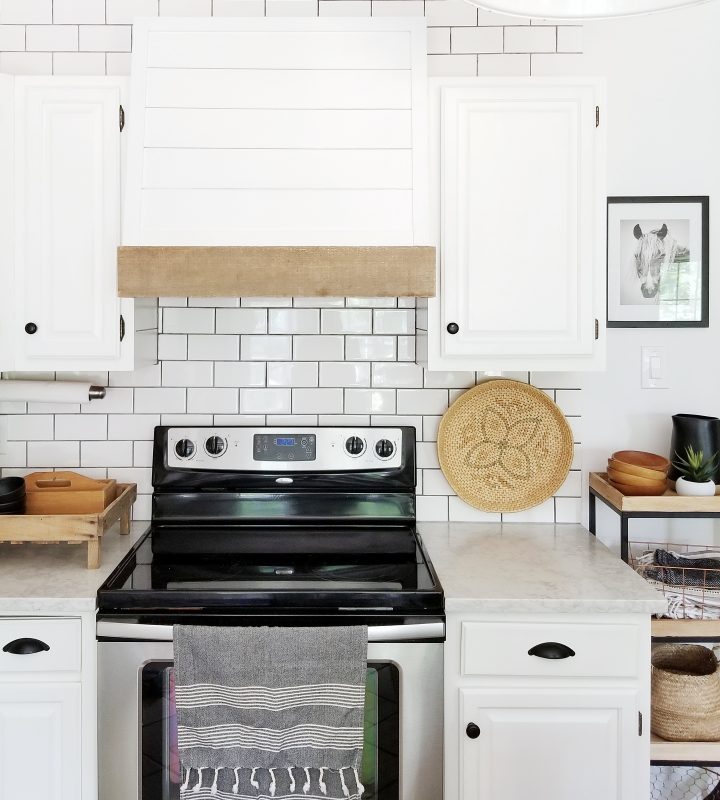
My husband and I talked through the design of it, knowing that I wanted to incorporate a piece of rustic barn wood that I’d been holding onto the last 2 years. I actually got that wood from the same barn where I found the open shelves that we have in our kitchen. The guy had given me that piece for free, and I always knew it would be perfect for a future home project, and the range hood was the lucky winner! I love the color of the naturally aged wood and the organic rustic vibes it adds to this space.
When designing this, we knew we had to accommodate for the fact that we’d be working around the existing range hood and upper cabinets. If it weren’t for those factors, I probably would have chosen a different shape, but I have learned to embrace what we are working with in this home and to choose joy in finding a design solution that is much better than what is currently there, even if it is not my first choice. And I do love the design we came up with in the end!
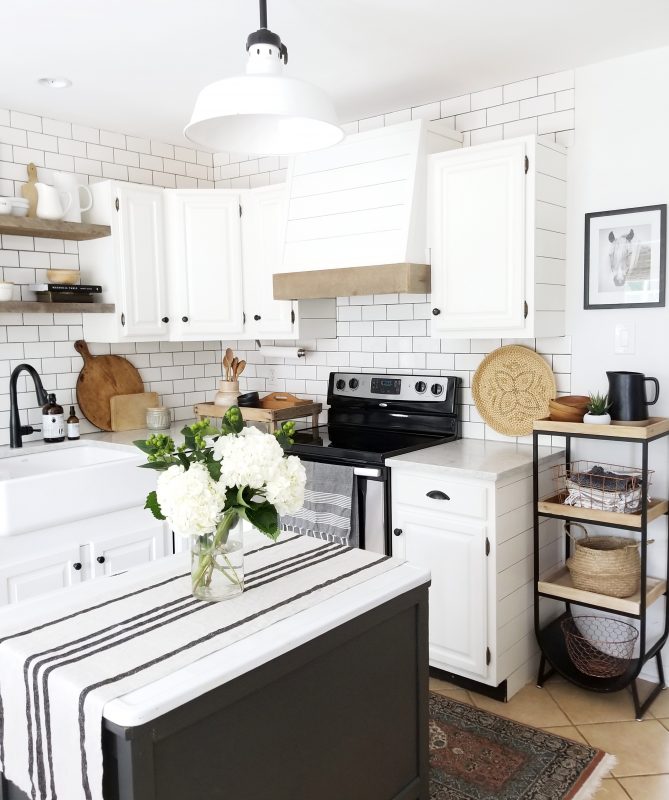
We added shiplap to the front panel to provide visual interest, and because it also ties in with the shiplap that we have on the end of our cabinets. However, we chose to keep the side panels more simple in order to balance the space and not get overly shiplappy 😉 It felt like the right balance for our home and our style preferences!
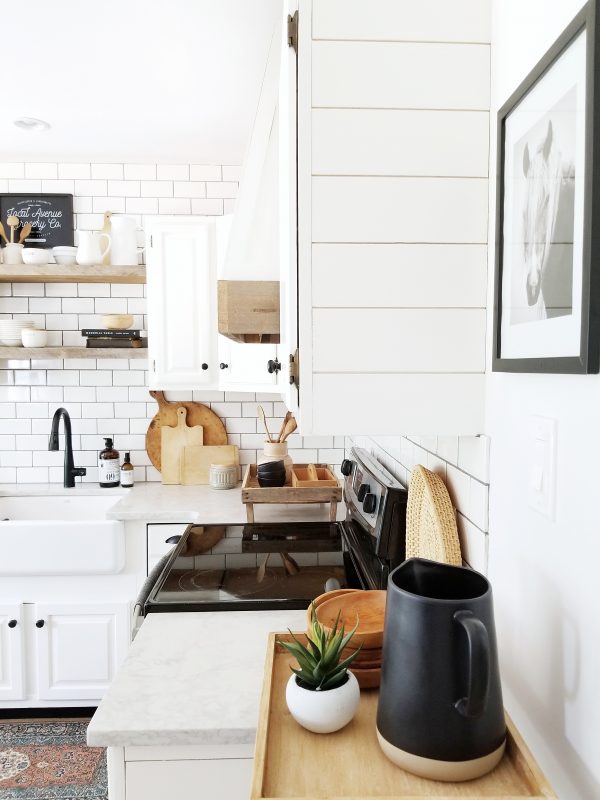
Many people asked us if this range hood is still functional, and the answer is yes! My husband was able to re-work the electrical components so that this still functions. And we angled the front shiplap panel in such a way that it leaves a slight gap at the top for the heat to vent out of. I’m all about style and function coexisting, so I’m thrilled to have a range hood that looks better AND still works the way it needs to.
In our relationship, I am the one with the ideas, and my husband Chris is the one with the practical skills to bring them to life. And for that I am definitely grateful! We make a good team, and I’m so glad that I asked for this project as a birthday present this year! I am planning a more detailed tutorial on how we built this range hood, so if you have any questions or details you really want to know, comment below so that I can be sure to answer that for you. Thanks so much for sharing my enthusiasm about this project as I shared about it this past week on instagram. I do have the progress documented in my instagram story highlights @cynthia_harper_ if you are interested in seeing more!
XO,
Cynthia
Leave a Reply


READY TO GROW YOUR INSTAGRAM AUTHENTICALLY?
I’m sharing the top 5 mistakes you’re making that are hurting your IG growth, and how you can solve them today!
GRAB MY FIVE TOP TIPS
WANTING TO MAKE YOUR SPACE MORE JOYFUL AND YOU?
There are three easy things I love to do to make my spaces full of joy and personality
DOWNLOAD THE GUIDE
FAVORITE POSTS:
Sometimes toys come along that are so fun, interactive and unique that you just have to have one. The new Little Live Pets My Puppy’s Home by Moose Toys is one of those! So we decided to surprise Bean with one. Have you heard about this toy?! It’s an interactive DIY toy that comes with […]
READ POST
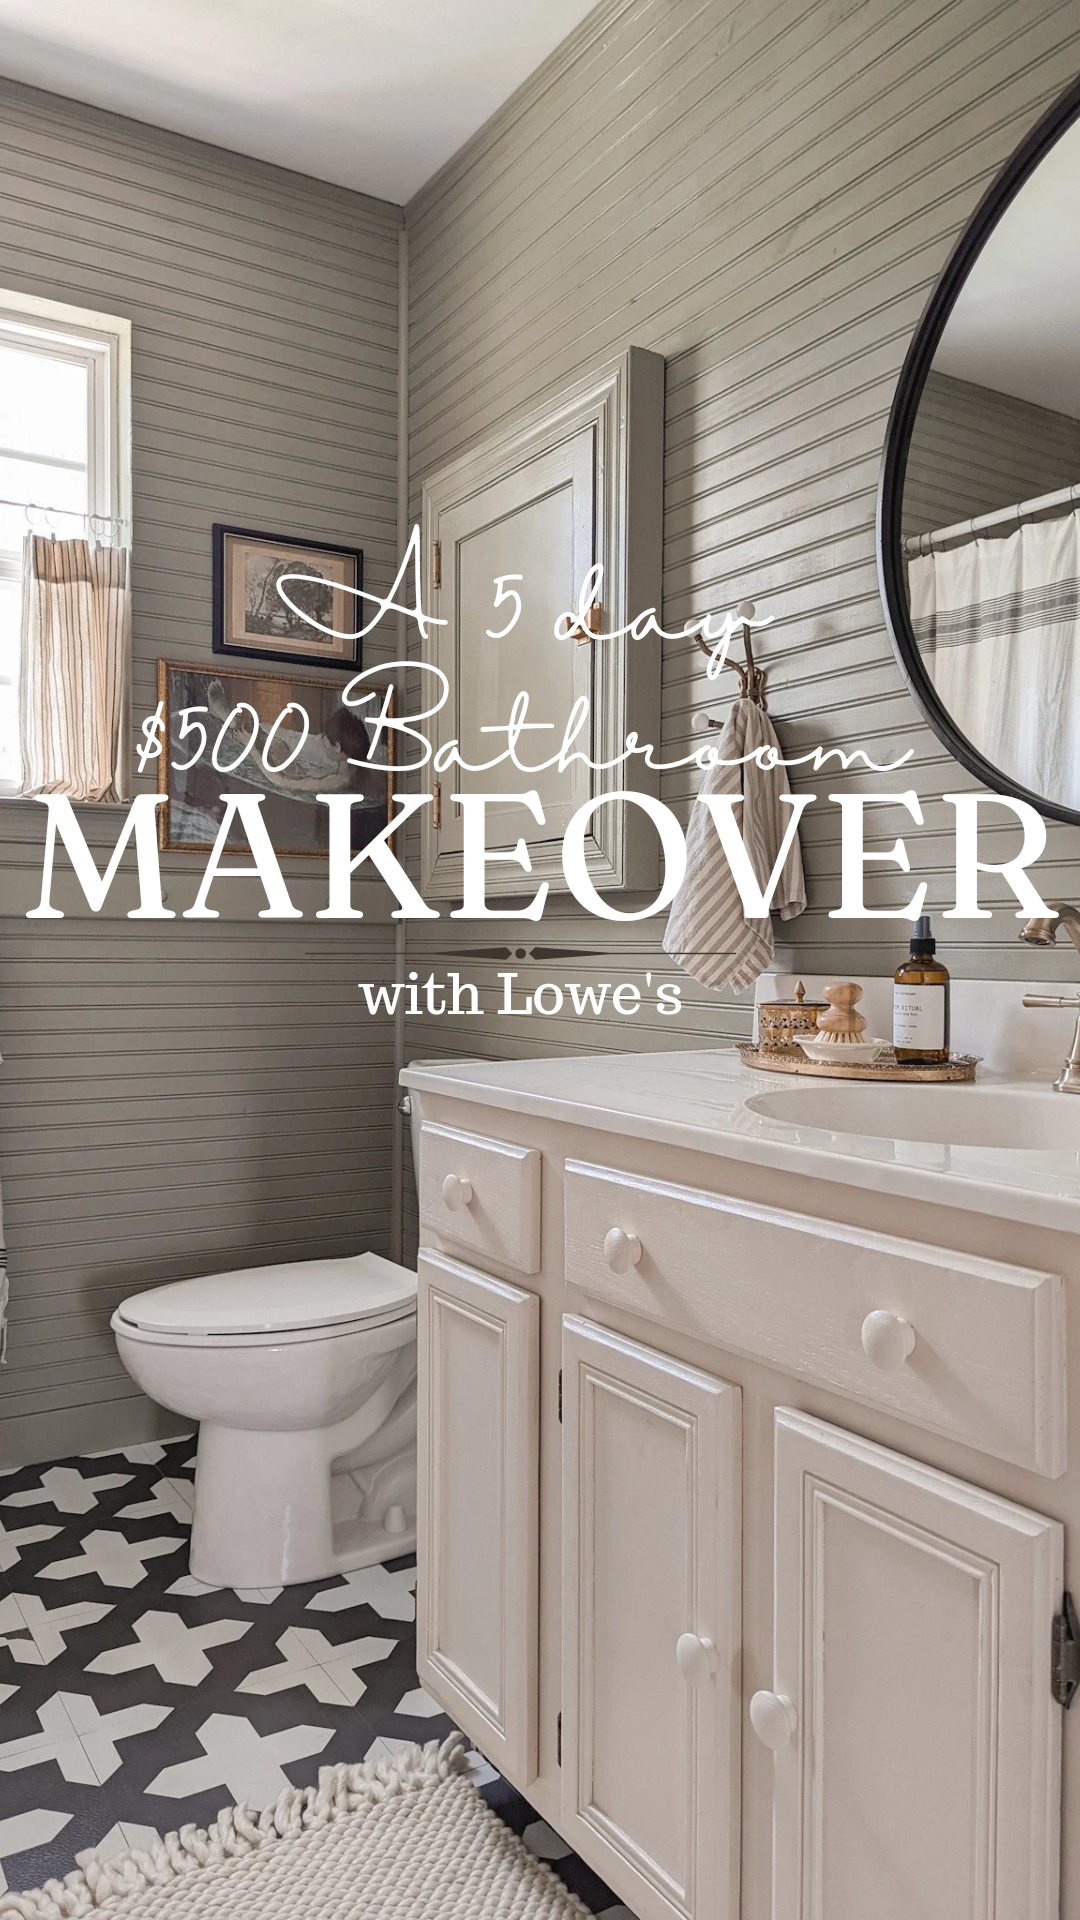
I was determined to give my bathroom a refresh for only $500 in just 5 days! I headed to Lowe’s for all the supplies because I knew I could find affordable products to complete the project. I selected beadboard planks as an easy and budget-friendly wall treatment, and choose Stainmaster paint in the colors Sweet […]
READ POST
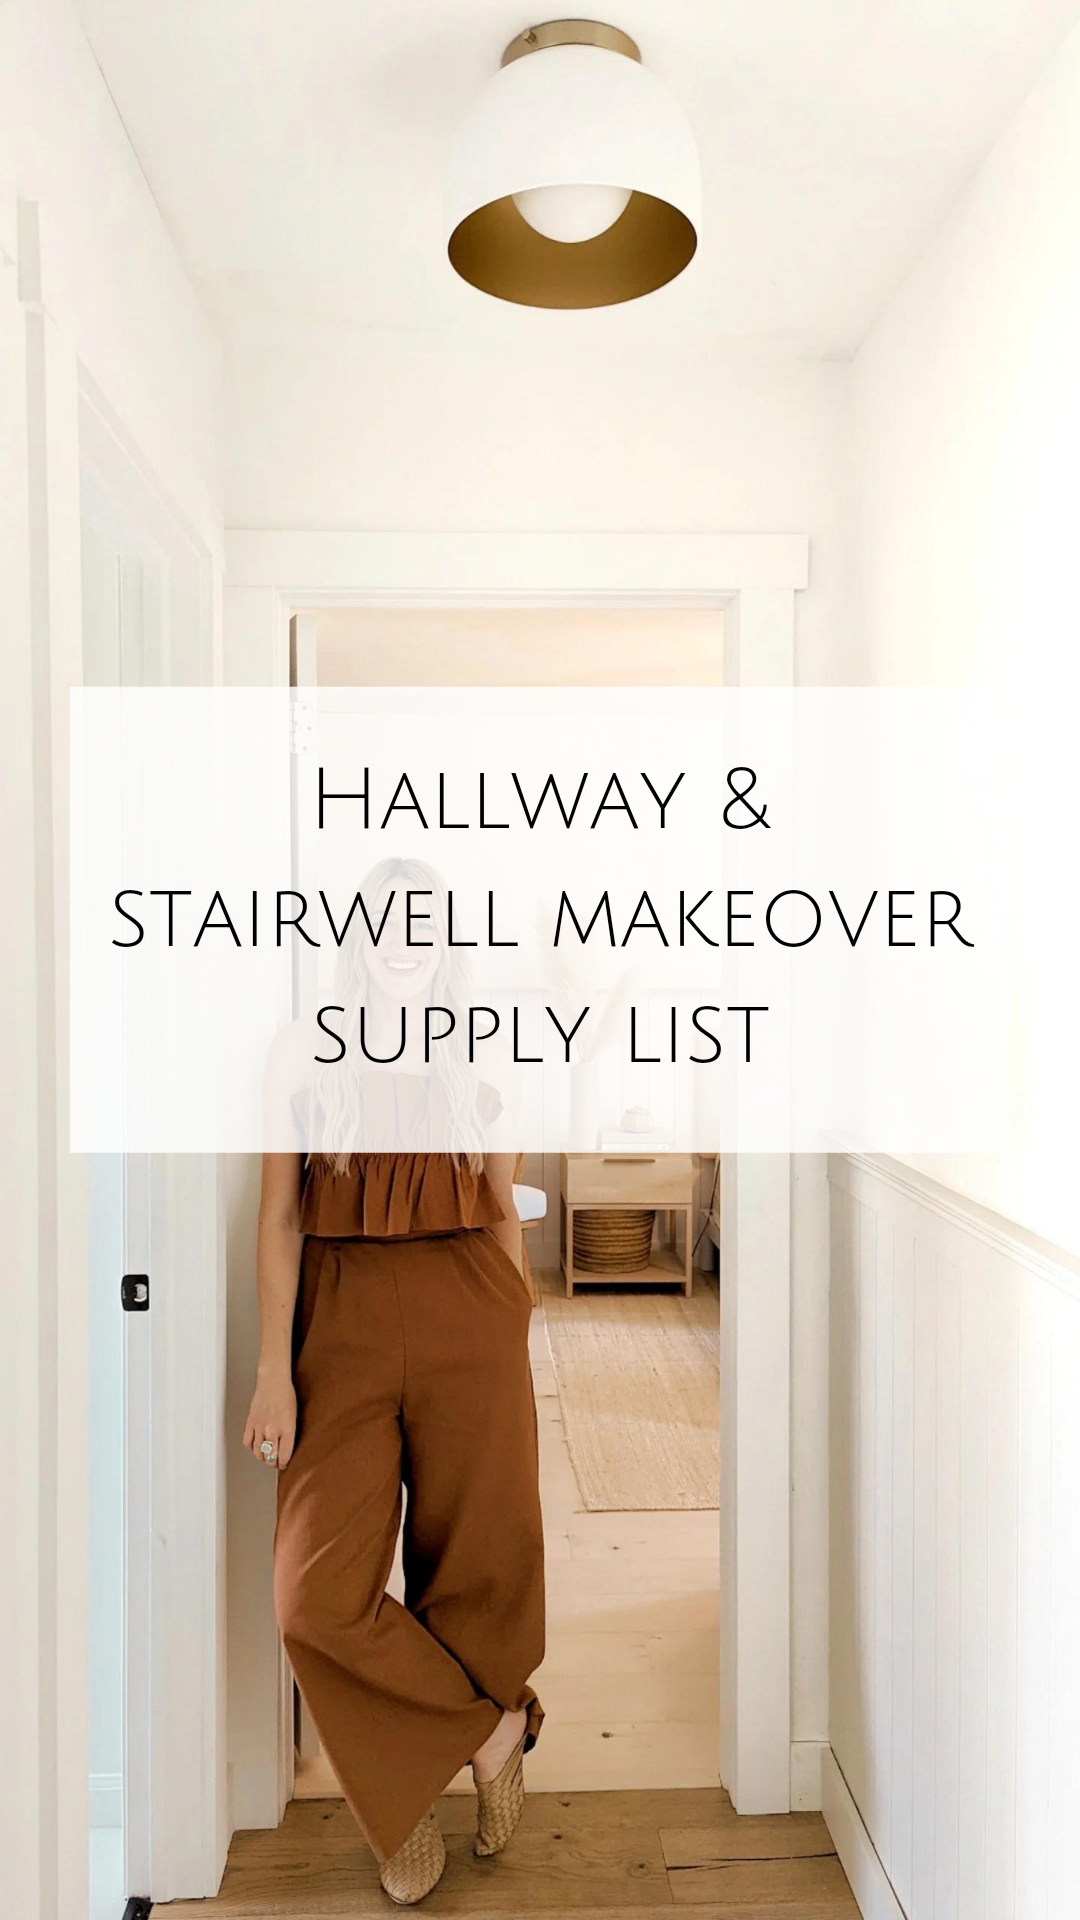
Here is a supply list of all the items I used in my stairwell and hall update if you would like to replicate it. Pine Bead Board: Top Trim: Decorative Moulding: Paint Colors: Bead Board: Sherwin Williams – Natural Cream in Eggshell Walls: Behr Scuff Defense – Polar Bear in Flat Railing Primer: Stix Primer […]
I love this Cynthia!! I wish we would have done something like this in our kitchen!! It goes so beautifully in yours!! Great Birthday present!!!
Thank you so much Trish! I truly appreciate that. Your new kitchen looks so beautiful though even as it is 🙂 Hope you have a great weekend, friend! XO, Cynthia
It looks amazing, girl! You guys did a great job!
Aloha,
Charlee
Thank you so much Charlee! I appreciate your kind words! I’m so happy with how this DIY project turned out. XO, Cynthia
Your kitchen turned out beautifully. I am hoping to update my kitchen this year and they way you did your’s gave me some great ideas on how I could do mine. Thanks so much for sharing your insights.
It’s a great post. Thanks for sharing