

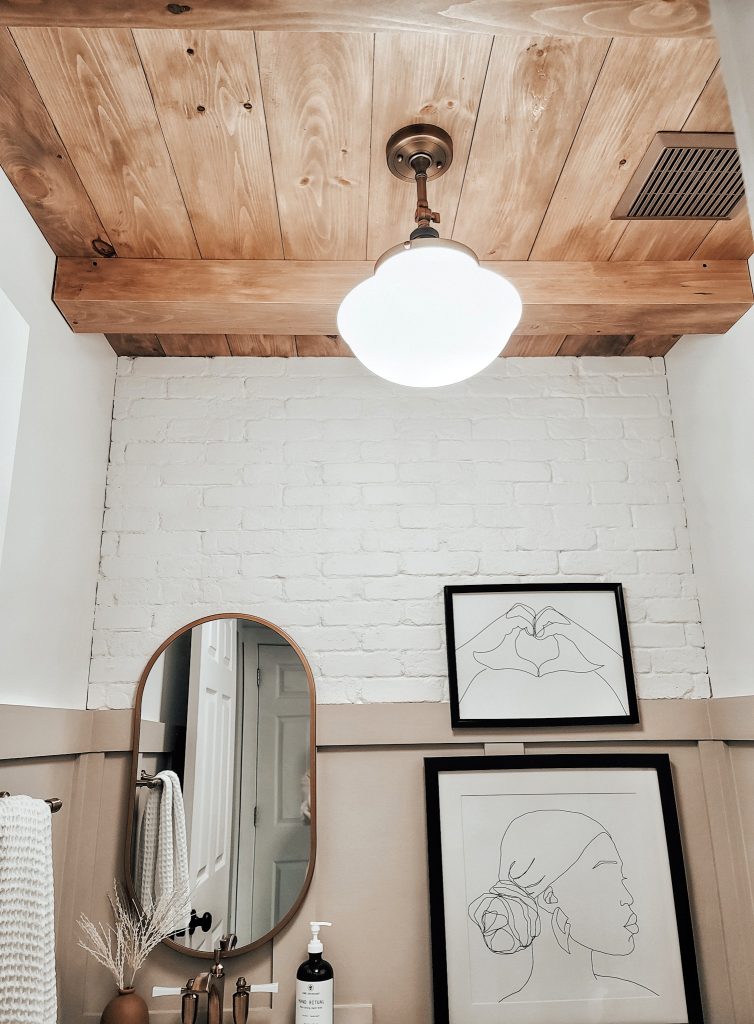
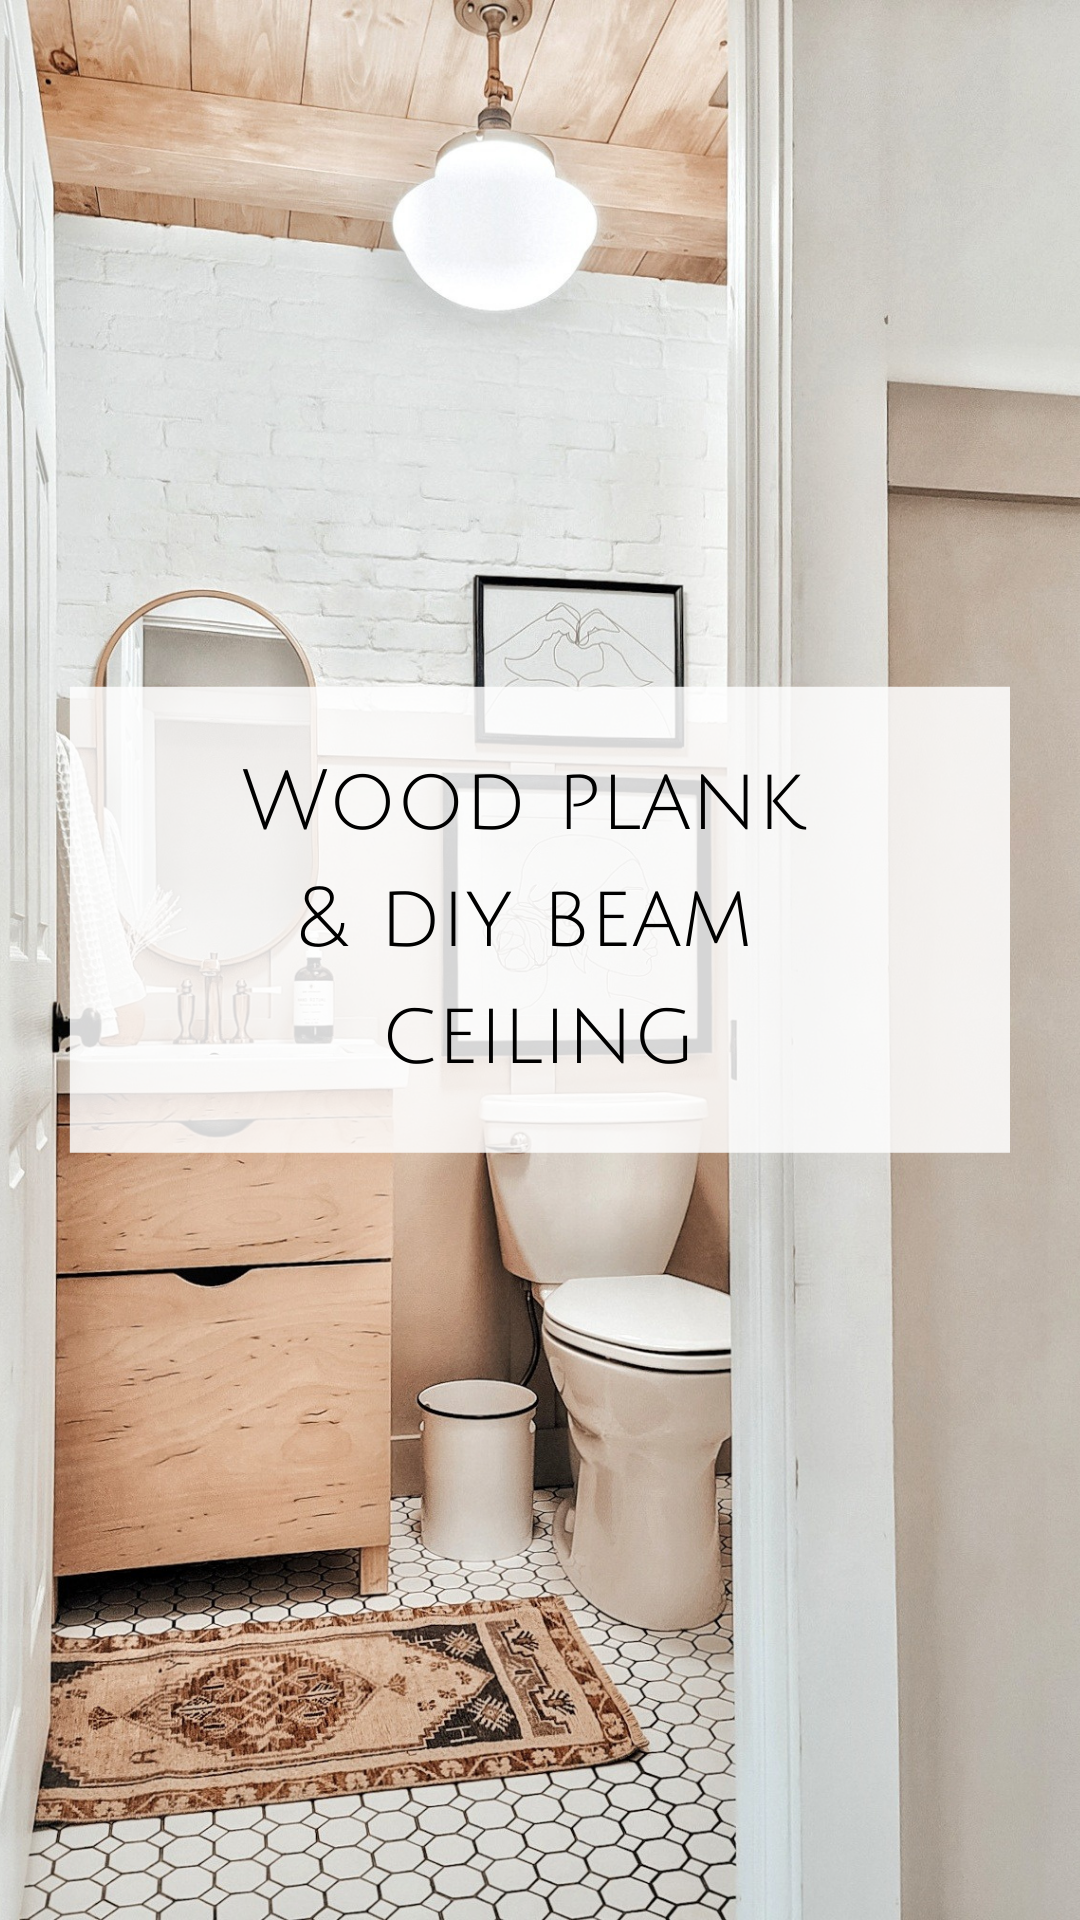
Planked Powder Room Ceiling with beams
Planked Ceiling
I told you in my last blog that I had a wish list of things I wanted to do in my house. Now that the brick is checked off, I am onto the next item on my list. . . . planked ceilings. I have always been in love with the charm and character that a wood planked ceiling has. Here is my step by step on how to add this look to your space.
To start, I used a stud finder to mark the ceiling where the joists were. I wanted to make sure the the planks were going to stay in place. The joist are just like a wall stud. There is more stability if you are able to nail directly into it. After marking them, I snapped a chalk line across the length of the ceiling so that I would know where to nail each time I added a new plank.
Planks and stain
I found these pine wood planks at my local home improvement store. The boards are 8′ long but my powder room is only 5′ wide, so I had them cut shorter at the store to make it easier to fit into my car. I typically love light-toned wood but because of the birch vanity and the white walls, I wanted the planks to add warmth to the room. So I envisioned a warm medium tone of stain. I couldn’t find the color I was looking for so I bought 2 of them and, in true Cynthia fashion, I decided to mix my own custom stain to try and get the color I was looking for. After playing around with a few combinations and test runs, I ended up using 2/3 Simple Pine to 1/3 Rustic Beige. As I began staining, I used a technique of wiping the stain on and then immediately wiping it off with a clean rag. This kept the color from getting too dark.
Ready to hang the planks
Before nailing the first plank, I calculated how many full planks would fit across. The remaining several inches I divided by two and then used that number to cut two planks to that width. Those two planks will act as my first and last piece on the ceiling so that it is symmetrical.
Then using 2″ nails and a brad nailer, I nailed the first skinny plank into each joist and then also did 2 on each end at an angle to catch the joist at the corners. I continued to do this for each subsequent plank.
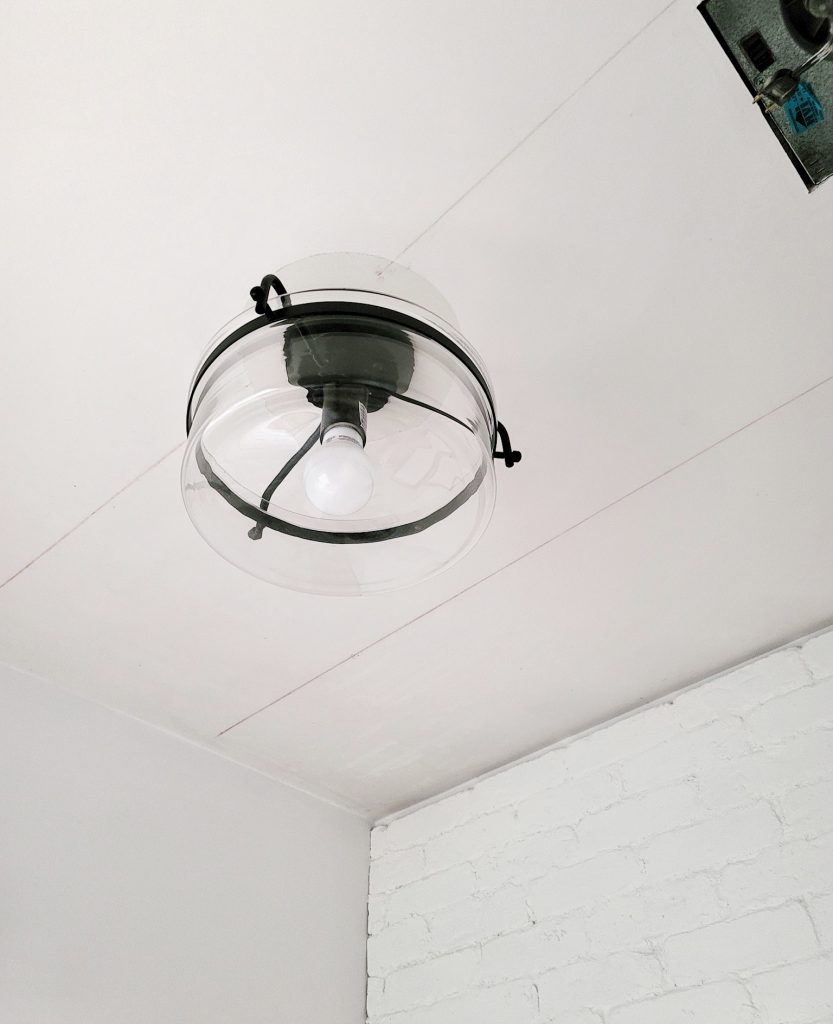
Light and Vent
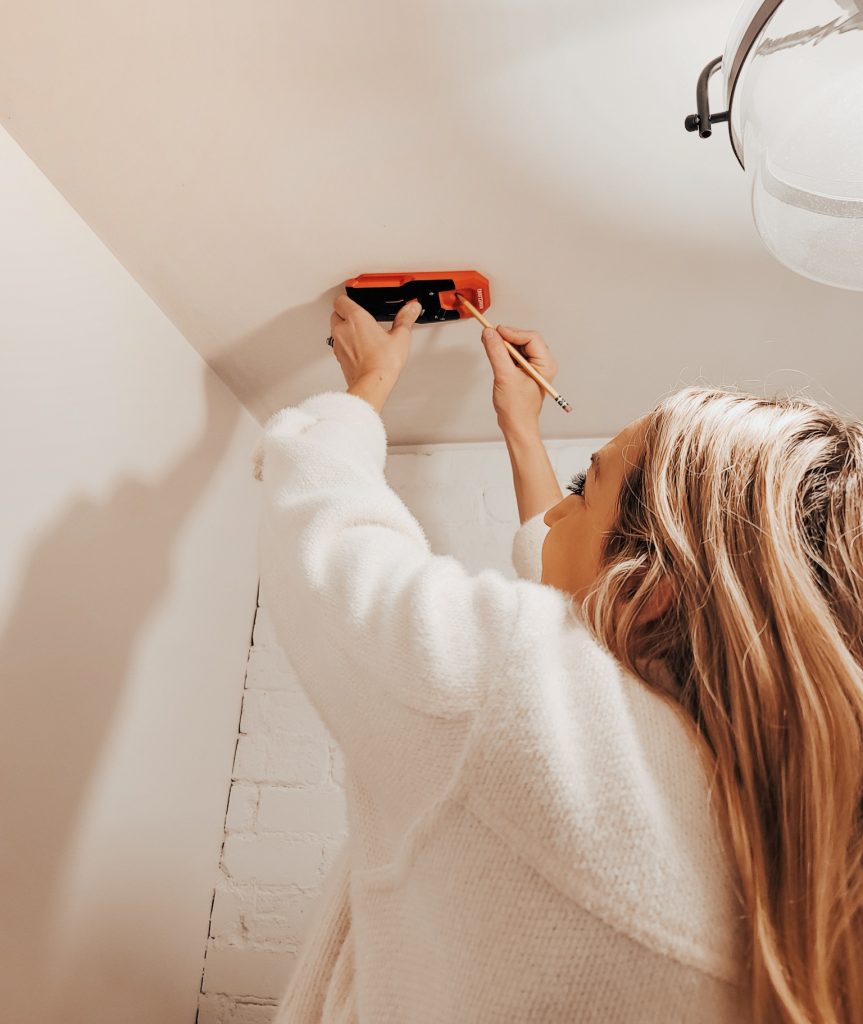
When adding the planks, I had 2 tricky spots I needed to work with. The first was the new light and the second was the ceiling vent. Since the light ended up right in the center of the plank, I used a spade bit tdrill into the board. I then used a jigsaw to cut a bigger hole for the light. I also had then had to use the jigsaw to cut out the vent space. After my holes were made I added the planks.
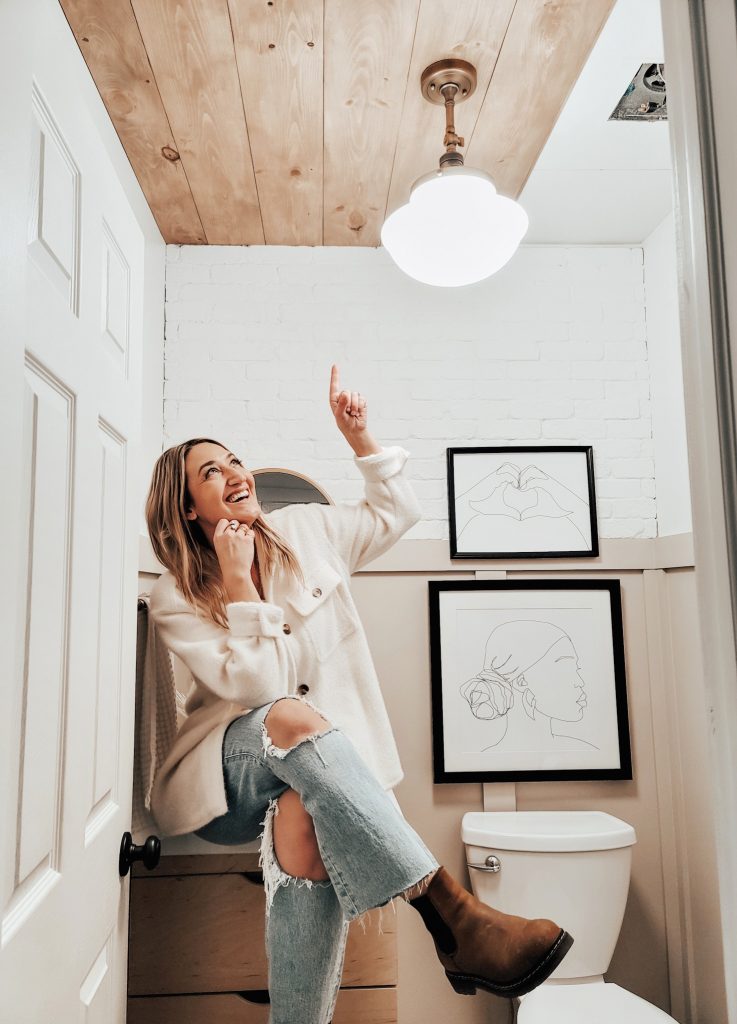
Because of adding the wood planks and beams, I also wanted a new light fixture that hung a bit lower. I had my Instagram followers vote on 2 different options, and this one here was narrowly the winner with a 53% majority vote. If you’re curious what the other one looked like, I’ll link it here.
Beams
To build the beams, I used the same planks that I used for the ceiling. Each beam is made of three planks, and has a bottom and 2 sides. So it essentially is like building a 3-sided hollow box. I mitered both edges of the bottom piece, as well as one edge of each side at a 45 degree angle so that they’d fit together without a visible joint. This way it looked like one solid piece of wood, even though it wasn’t. Then I wood glued and clamped them together.

Links to all the things:
Leave a Reply


READY TO GROW YOUR INSTAGRAM AUTHENTICALLY?
I’m sharing the top 5 mistakes you’re making that are hurting your IG growth, and how you can solve them today!
GRAB MY FIVE TOP TIPS
WANTING TO MAKE YOUR SPACE MORE JOYFUL AND YOU?
There are three easy things I love to do to make my spaces full of joy and personality
DOWNLOAD THE GUIDE
FAVORITE POSTS:

Sometimes toys come along that are so fun, interactive and unique that you just have to have one. The new Little Live Pets My Puppy’s Home by Moose Toys is one of those! So we decided to surprise Bean with one. Have you heard about this toy?! It’s an interactive DIY toy that comes with […]
READ POST
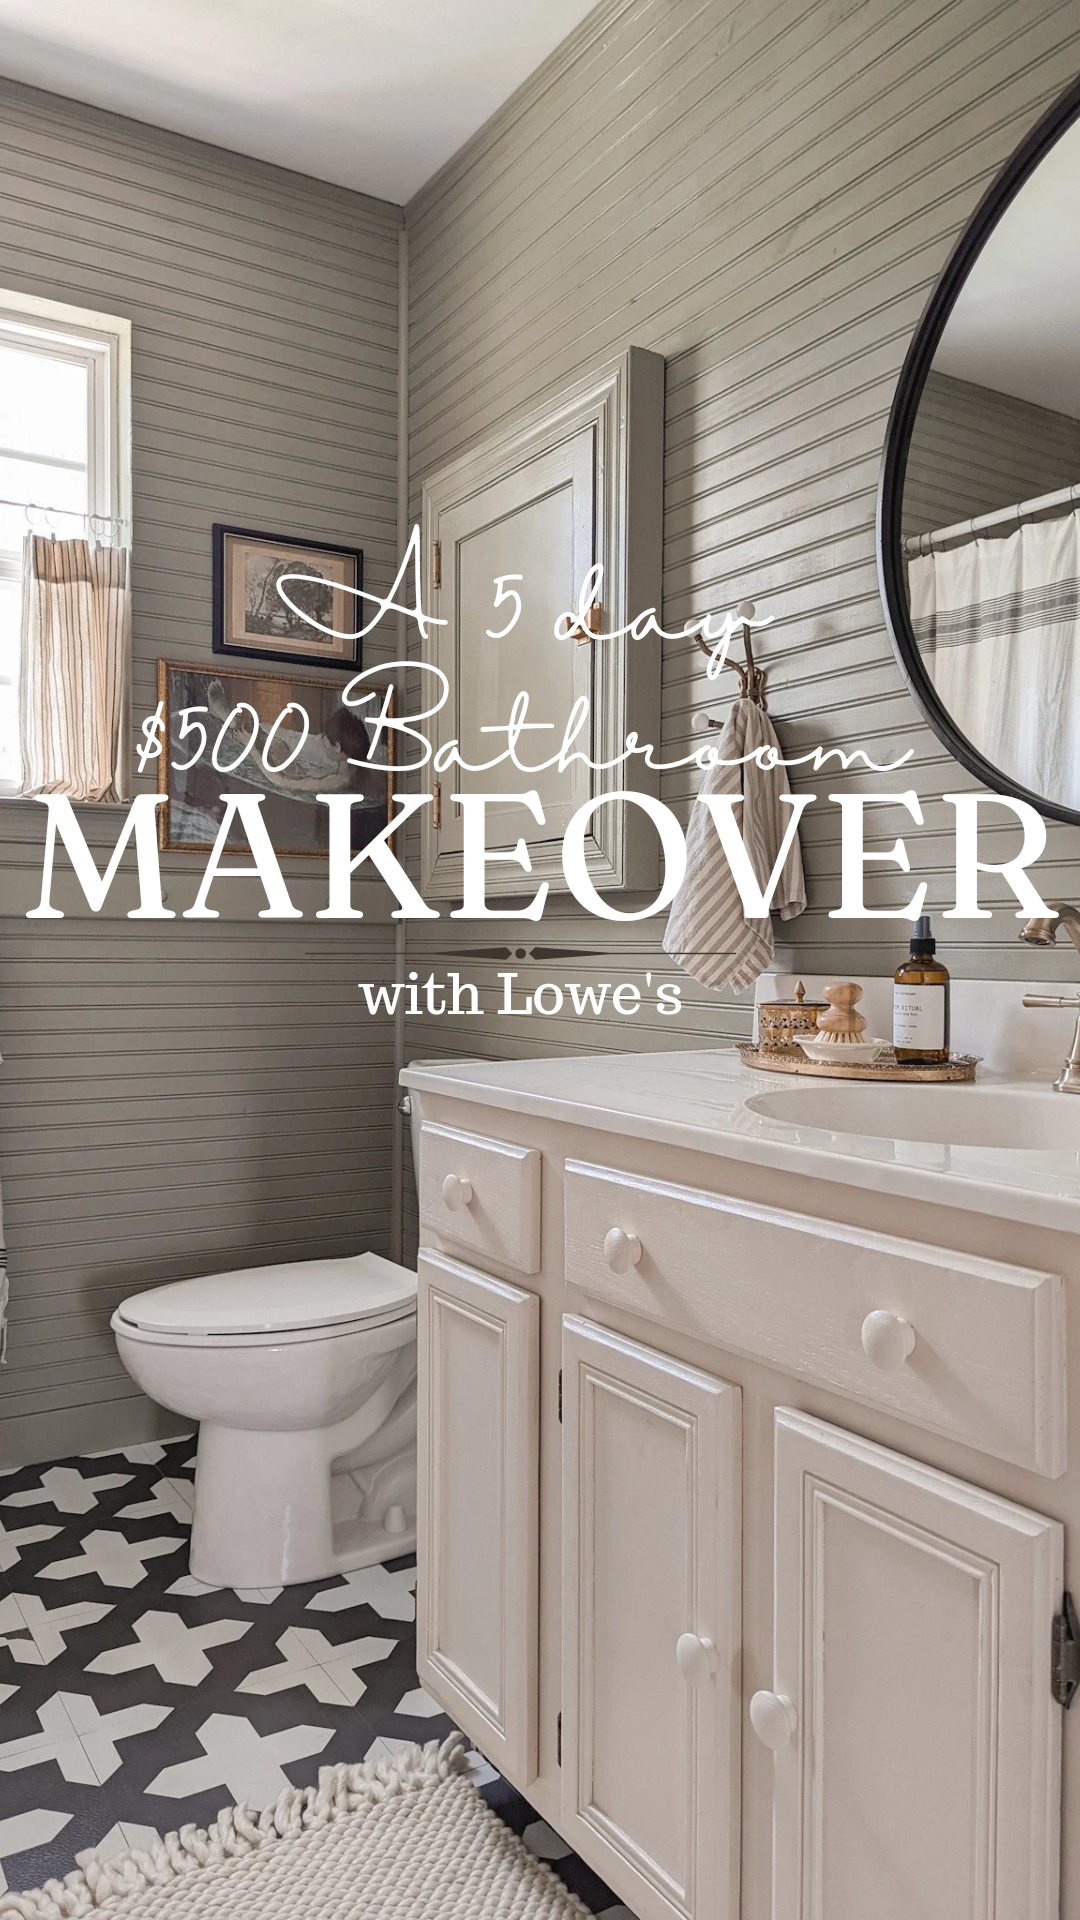
I was determined to give my bathroom a refresh for only $500 in just 5 days! I headed to Lowe’s for all the supplies because I knew I could find affordable products to complete the project. I selected beadboard planks as an easy and budget-friendly wall treatment, and choose Stainmaster paint in the colors Sweet […]
READ POST
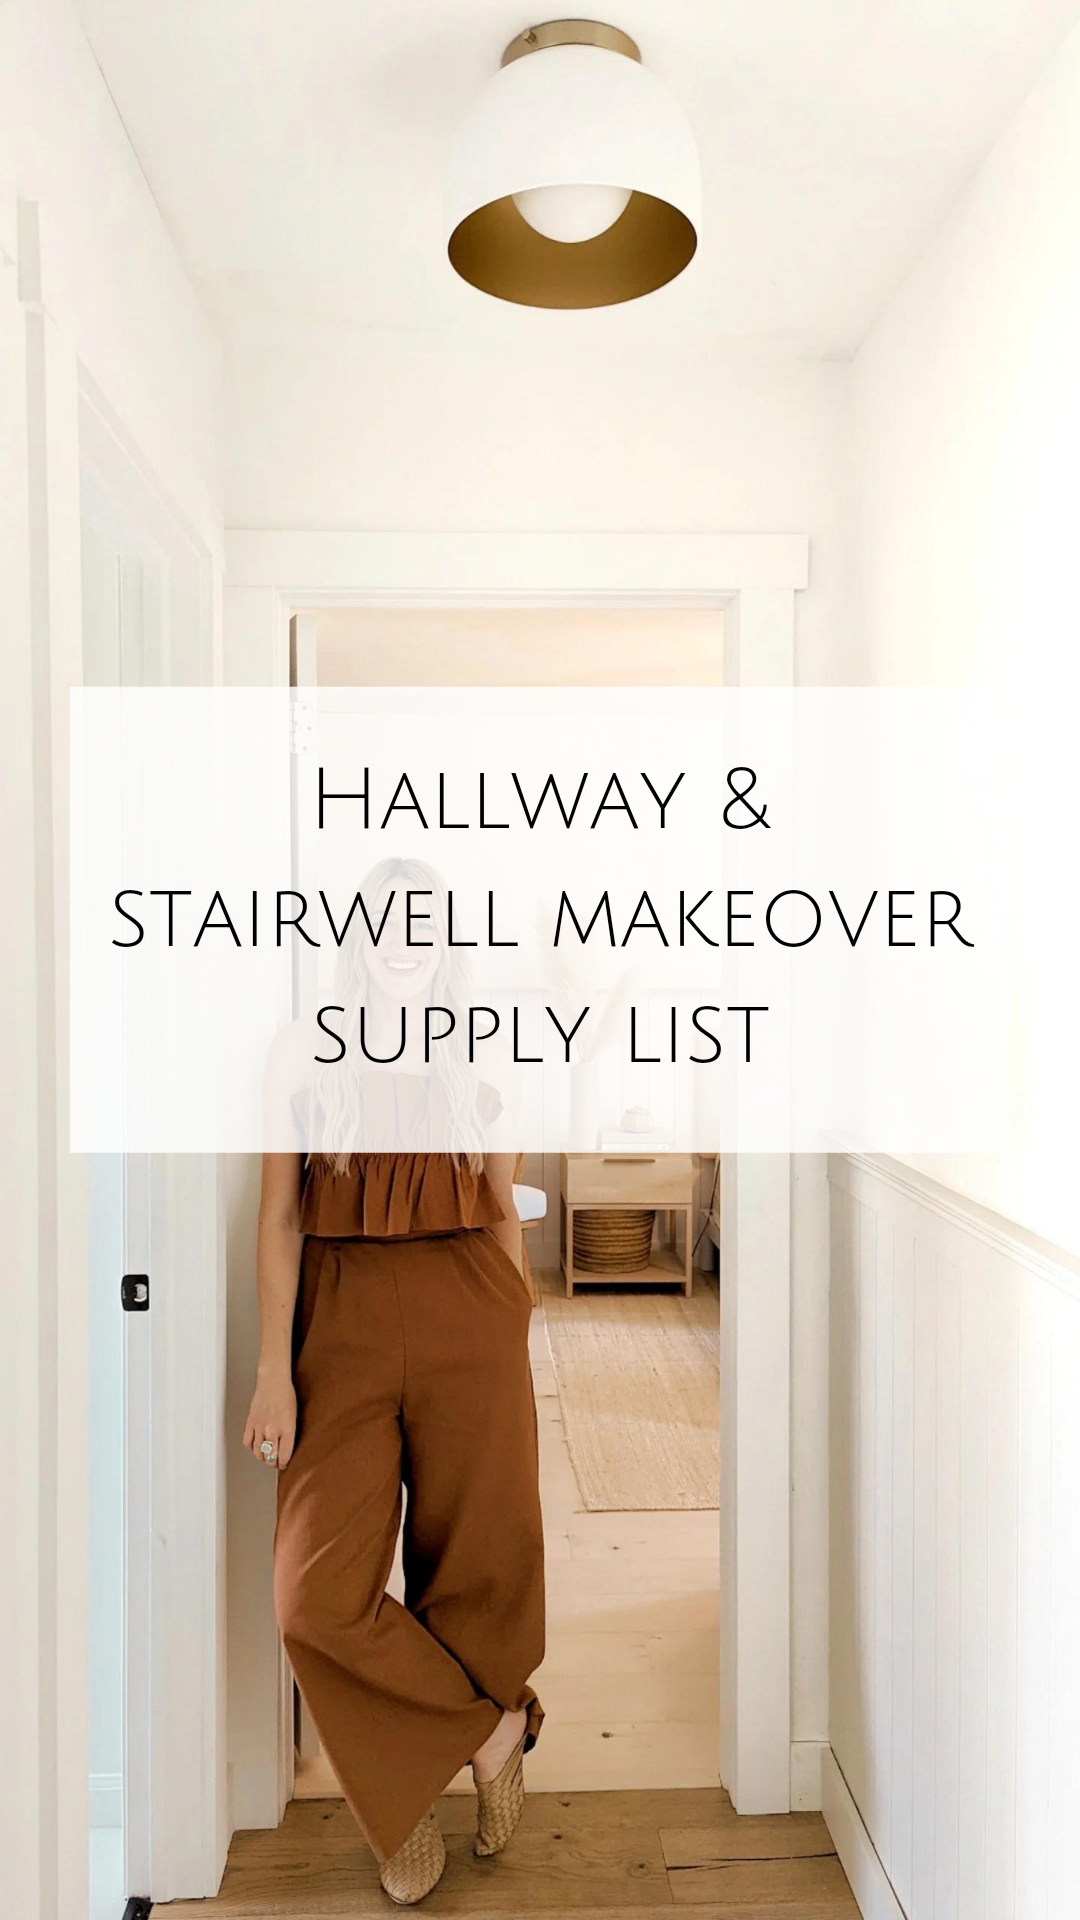
Here is a supply list of all the items I used in my stairwell and hall update if you would like to replicate it. Pine Bead Board: Top Trim: Decorative Moulding: Paint Colors: Bead Board: Sherwin Williams – Natural Cream in Eggshell Walls: Behr Scuff Defense – Polar Bear in Flat Railing Primer: Stix Primer […]
I would show that ceiling off too!!!!
It looks fabulous:)
Thank you!